

Make sure you are making a professional impression by setting up your email username correctly. This tip will explain how. As well as assisting with recognisability, this process also helps to ensure your mail isn’t mistaken for spam.
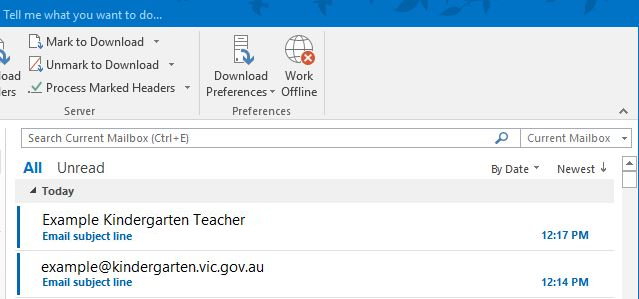
Below are to emails sent from the same account one before editing the account name and one after. With the first email, the recipient can instantly see no one has set up the email account name correctly. In the second email, after correct configuration, the sender’s preferred full name is displayed in the From field.
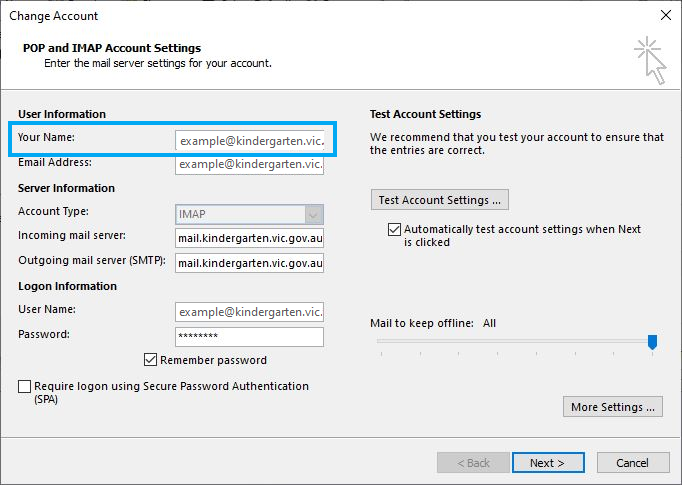
The Outlook setup wizard doesn’t let you define the name during setup, so here is how you manually go back into your account settings and define the name.
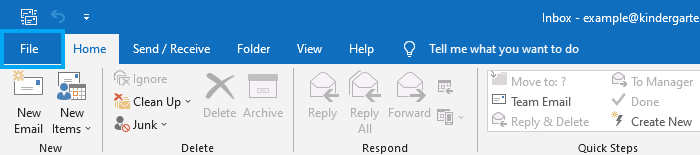
- With Outlook open, access the Backstage View by selecting File.
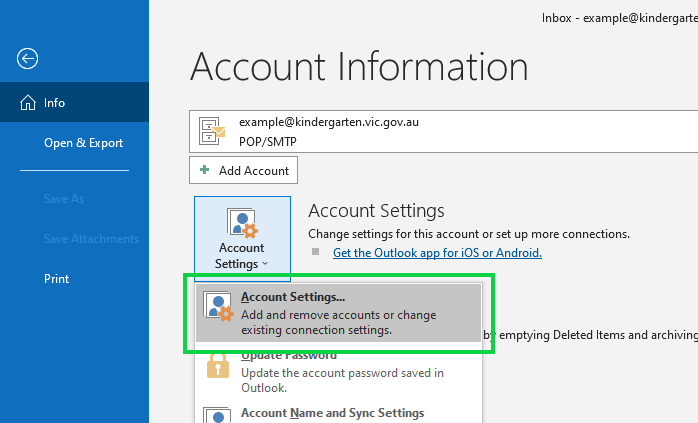
- From the Info menu select Account Settings and then Account Settings… from the dropdown.
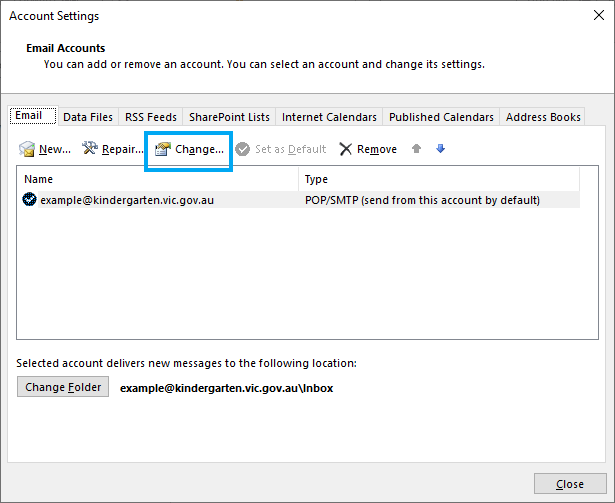
- From the Account Settings pop-up make sure you are on the first tab called “Email” and have the address you want the edit selected in the preview, then select Change.
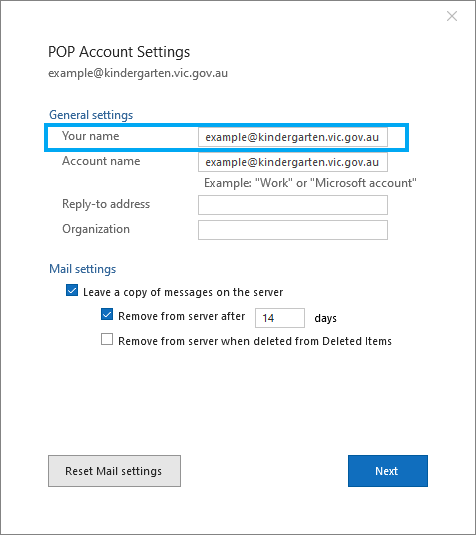
- The options to change your account settings will appear. Your version of Outlook may display slightly differing account setting options, but the field to update will be called “Your name”.
- In Outlook 2016 or 2021 etc. you will find the “Your Name” field listed under User information.
- In Outlook 365 you may find the “Your Name” field listed under General settings.
- Update this field with your full title or whatever professional handle you want recipients to see.
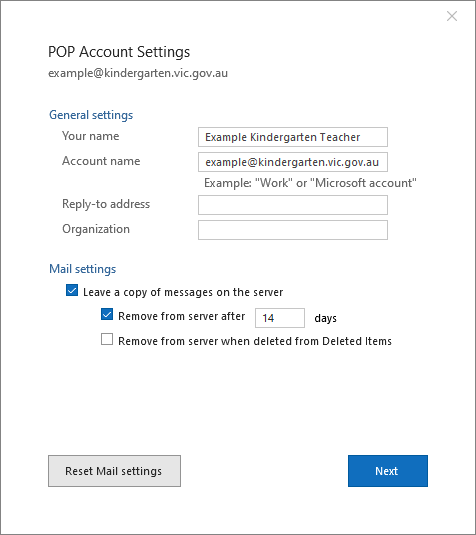
- Then select Next to complete the change.