

This tip will explain one of two methods of creating contact groups in Outlook from an Excel spreadsheet. The guide assumes you have the contact details in an Excel spreadsheet sorted into the appropriate groups. Our example uses an Excel spreadsheet of family contact details sorted into each child’s enrolment group.
 If you need a refresh on reorganizing or combining columns refer to this related tip: Tip – Reordering columns and combining columns in Excel.
Add a new Outlook Address Book
Before using either method, add a new address book in Outlook People. This will help keep the new contacts organized, separate from other sets of contacts and allows you to delete or redo the address book without confusion.
Open Outlook and select People. In the My Contacts navigator right click on the Contacts for your email and select New Folder. Note if you have the option “New Folder Group” instead of “New Folder”, this means you incorrectly right clicked on the navigator title.
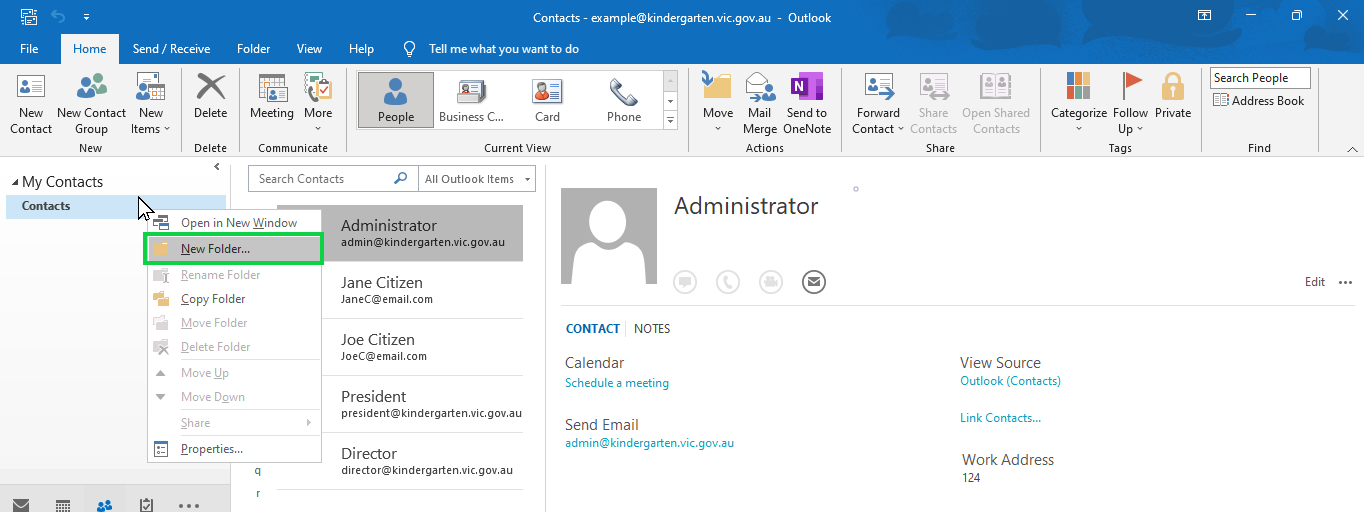
In the Create New Folder window confirm that you have the Contacts folder selected and type an appropriate name i.e. 2023Families.
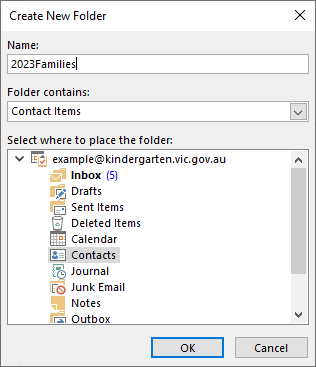
Click OK.
Add Contact group – quick copy/paste method.
This method doesn’t add each family as an Outlook contact, it simply pastes the addresses into a Contact Group.
In your spreadsheet ensure you have a full name column next to the email address column.
Find the group of contacts that you want to add to a specific group.
Drag a selection over both columns so you have the name and email address cells selected for all the families in the group. If the columns have a title header do not include that line in the selection.
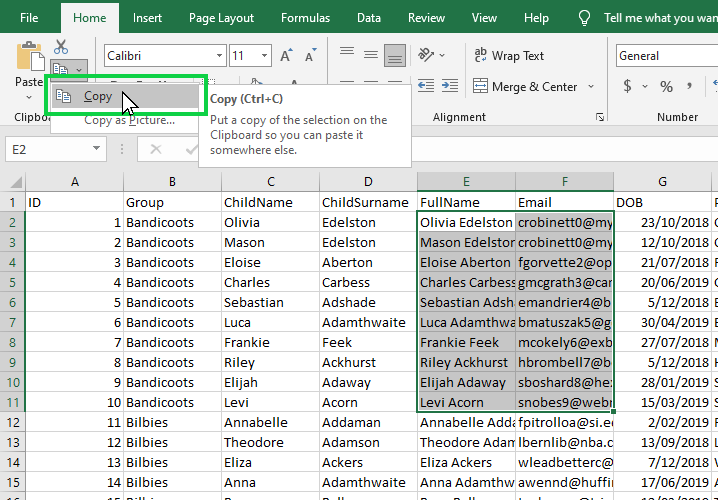
Select Copy.
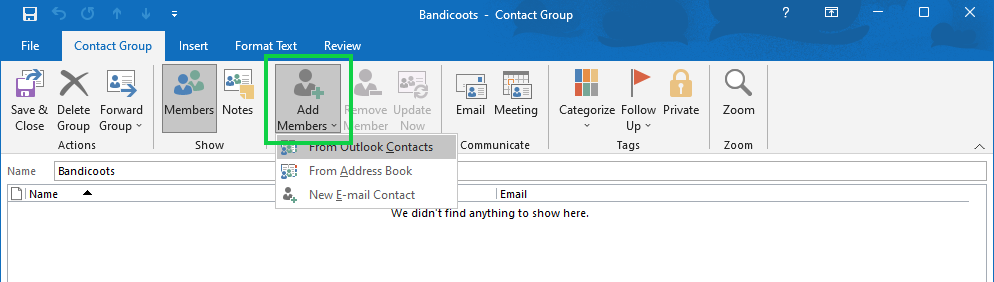
Return to the People view in Outlook and select your new Address Book i.e. 2023Families. From the Home ribbon select New Contact Group.
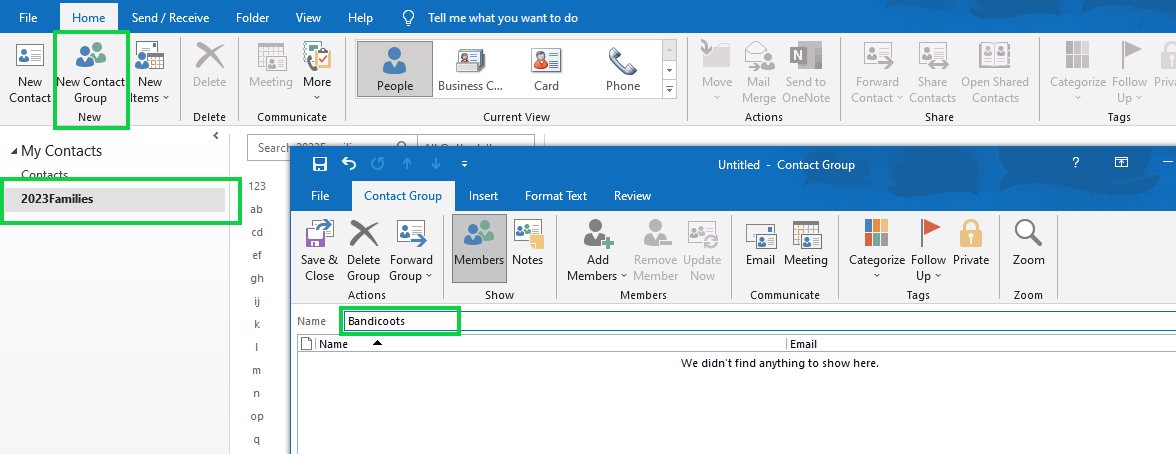
The Contact Group editor will open. Click the Name field and type the name of the group.
Select Add Members –> From Address Book.
Locate the blank field next to the Members button at the bottom of the pop-up. Right-click in the blank field and select Paste from the menu.
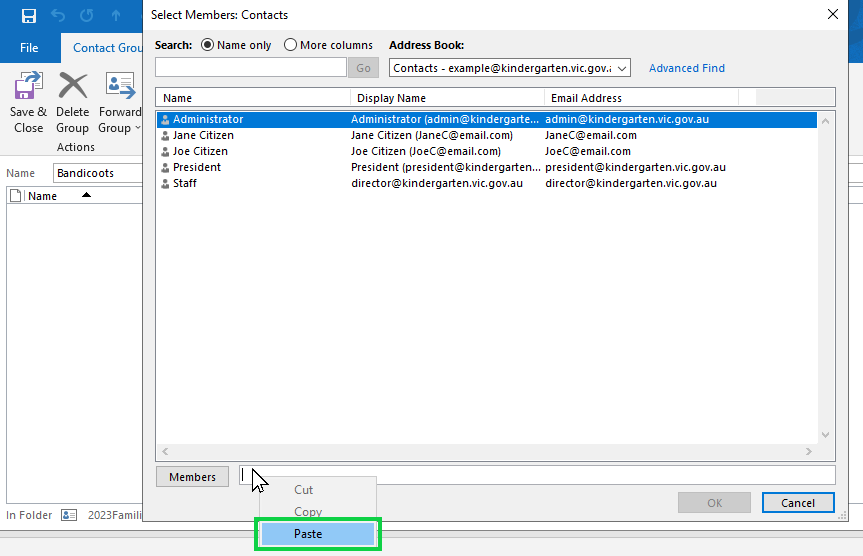
If the paste option is grayed out, you need to return to Excel and click Copy to add the selection back to the clipboard.
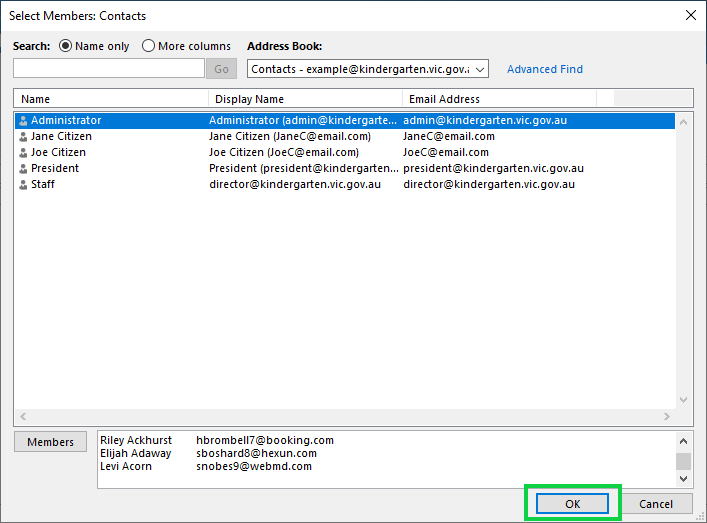
Click OK once the names and email addresses are pasted. The addresses will be added to the group.
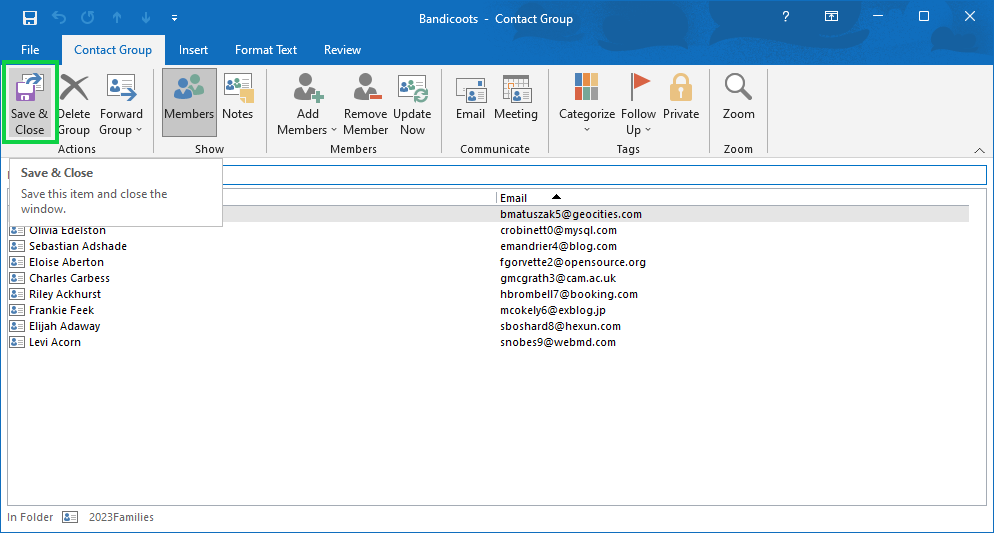 Click Save & Close to complete the contact group.
Continue creating groups and pasting in the appropriate selections from Excel.
Note in our example, two of the selected contacts were from the same family with different names but matching email address. Only the first instance of the email was added to contact group.